<
div dir=”ltr” style=”text-align: left;”>
Create Mavericks USB from linux
Requirement :-
Terminal Command to install package:-
# sudo apt-get install hfsprogs# sudo apt-get install gpartedd# sudo apt-get install p7zip-full
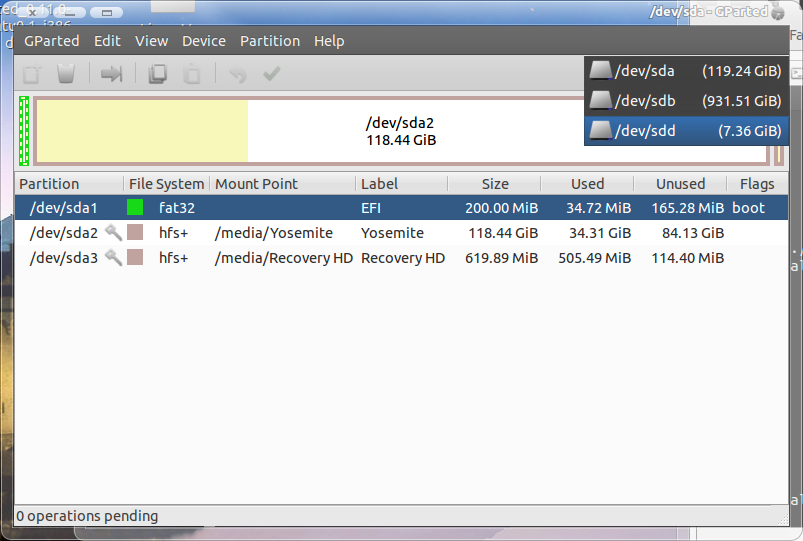

Boot your Linux System and Make a folder named as Linux-Mac on desktop which contain 5 folders named as 0,1,2,3,4,5 and add Mavericks.app which u downloaded from App Store.
# cp ~/Desktop/Linux-Mac/Install OS X Mavericks.app/Contents/SharedSupport/InstallESD.dmg ~/Desktop/Linux-Mac/0# cd ~/Desktop/Linux-Mac/0# ls# 7z x InstallESD.dmg InstallMacOSX.pkg/InstallESD.dmg -o../1# cd ../1/InstallMacOSX.pkg# 7z x InstallESD.dmg 3.hfs -o../../2# sudo mkdir /mnt/InstallESD# cd ../../2# sudo mount -o loop 3.hfs /mnt/InstallESD/# cd ../3# cp -r /mnt/InstallESD/Packages ./# cp /mnt/InstallESD/BaseSystem.chunklist ./# cp /mnt/InstallESD/BaseSystem ./# 7z x ./BaseSystem.dmg 3.hfs -o../4# sudo mkdir /mnt/BaseSystem# cd ../4# sudo mount -o loop 3.hfs /mnt/BaseSystem/# sudo cp /mnt/BaseSystem/* /media/MacInstaller -r# sudo rm /media/MacInstaller/System/Installation/Packages# cd ../3# sudo cp -r Packages /media/MacInstaller/System/Installation# cd ../5# sudo 7z x -so /media/MacInstaller/System/Installation/Packages/BaseSystemBinaries.pkg Payload | bunzip2 | cpio -i# sudo cp mach_kernel /media/MacInstaller/
Step 3=Making USB Flash Drive Bootable
mount | grep MacInstaller # cd ~/Desktop/Install # sudo dd bs=446 count=1 if=boot0 of=/dev/sdb # sudo dd if=boot1h of=/dev/sdb1 # sudo cp boot /media/MacInstaller # sudo cp -r Extra /media/MacInstaller
Step 4=Unmount directory
Remover directory
# sudo rmdir /mnt/BaseSystem
Step 5=Download Necessary Kext
NullPowerCPUPowerManagement.Kext,
VoodooPS2Controller.Kext
These are the important kext which allow you to reach the installer screen without of this you will never get the Installation screen and this kext you can download it from Tonymacx86 Once you download the kext simply add it to USB(MacInstaller)/Extra/Extensions
Once you copy the kext add Org.Chameleon.Boot.Plist USB(MacInstaller)/Extra/
Quick Note:-(Directory is very important if you type wrong you won’t able to make USB) This guide is tested on Cylon Linux which is basically Distributed from Ubuntu and If you successfully made the USB and still you unable to boot USB or you get error like Boot0 then use following step