Now days many People search for VMWARE Guide related to dual boot or installing Linux but this is VMWARE Guide is all about how easily Install Mac OS X 10.9.5 Mavericks on VMWARE. Well To being true Hackintosh user i always do experiments on kernel,kext,plist and so on and because of this experiments i have to suffer many troubles like Kernel Panic,Re install OS X or take Time Machine Backup it is quite painful work but if your machine is part of the mainstream configuration or your hardware is not support Hackintosh but still want to use MAC OS then this article will help you,On this VMWARE Guide we will show you how easily install Mavericks DIstro On VMWARE
Ultimate VMWARE Guide for OS X Mavericks
The following article use virtual machine method using VMWARE Workstation with MAC OS X Distro like iAtkos or Hackintosh Zone We have already wrote VMWARE Guide for Retail dmg installation
Requirement For VMWARE Guide (OS X 10.9.5) :-
MAC OS X Distro like iAtkos or Hackintosh Zone
VMWARE Workstation
VMWARE Unlocker
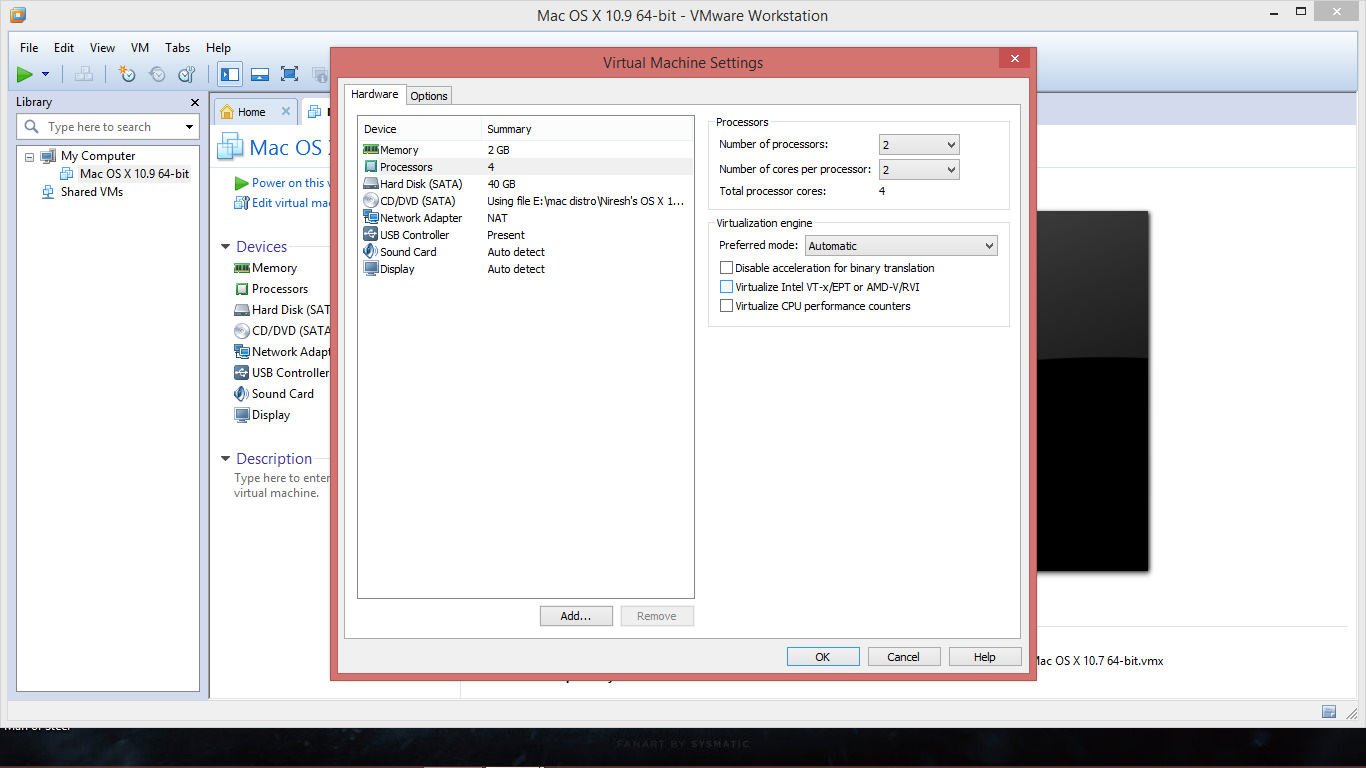
(This VMWARE Guide Needs your VMWARE Workstation to support hardware visualization technology (Visualization) of your CPU,Currently Intel Core I series and AMD Athlon series, FX series CPU are fully supported. And Visualization is also called as the name was Intel VT-x and AMD-V.)
Follow the Steps to Install OS X Mavericks on VMWARE
Step 1:-Download Mac OS X Mavericks Distro or Mountain Lion Distro from above link
Step 2:-Download and install VMWARE workstation
Step 3:-Run VMWARE Unlocker 1.2.0 Run “unlock-all-v120/windows/install.cmd” (see unlock-all-v120/readme.txt for more info and other options) See Unlocking VMWARE
Step 4:-Create a new virtual machine for the Mac OS X 10.9 Mavericks (64 bit) Source installation be the CD/DVD
Step 5:-Install MAC OS X (Following method is the easiest way to install Mavericks Distro On VMWARE)
Step 6:- For a new installation of OS X, you MUST format the destination drive according to the following steps before continuing.
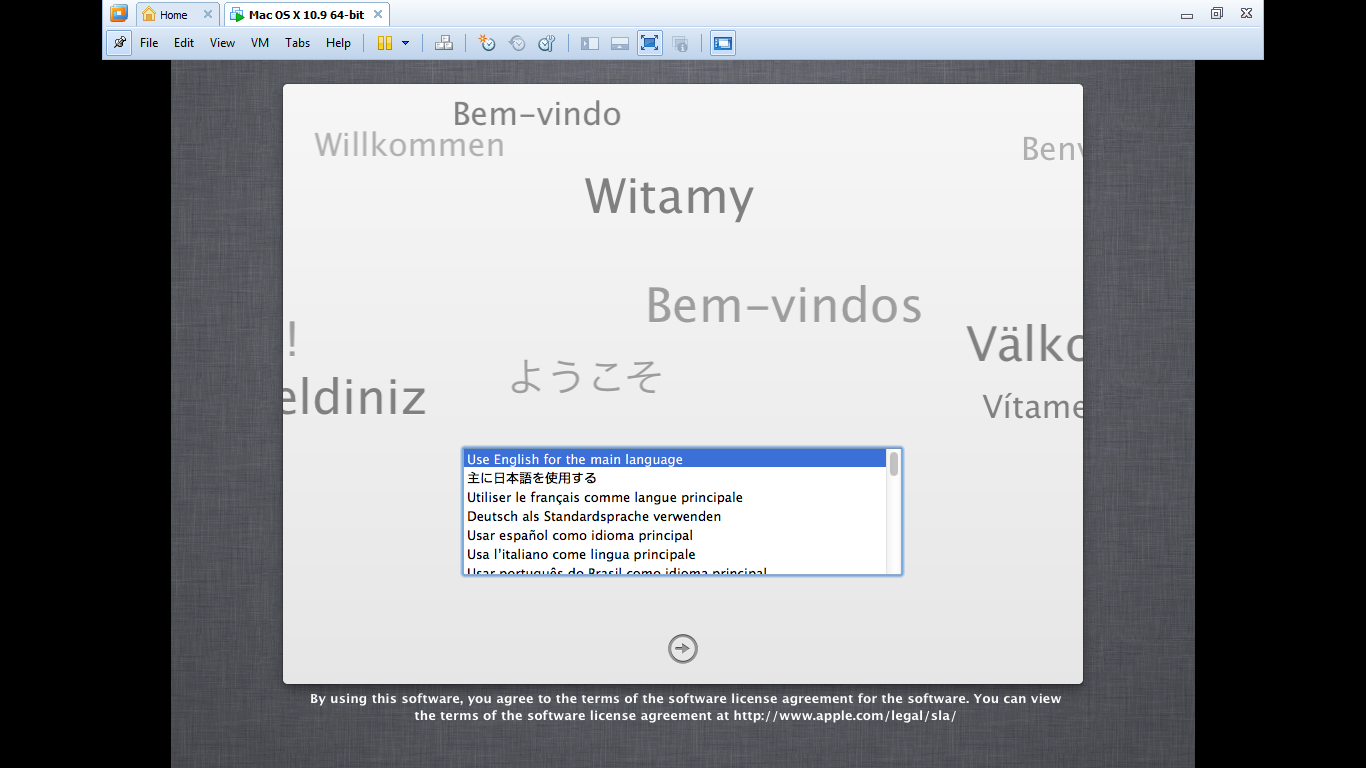
- Select you native language
- In the top menu bar choose Utilities, and open Disk Utility
- Highlight your target hard drive for the Mountain Lion installation in left column.
- Click Partition tab
- Click Current and choose 1 Partition or you make any
- Click Options…
- Choose GUID Partition Method or MBR
- Under Name: type OS-X (You can rename it later)
- Under Format: choose Mac OS Extended (Journaled)
- Click Apply then Partition
- Close Disk Utility
Step 7:- When the installer asks you where to install, choose OS-X, or your existing desired drive..
Step 8:- On successful completion, restart the system
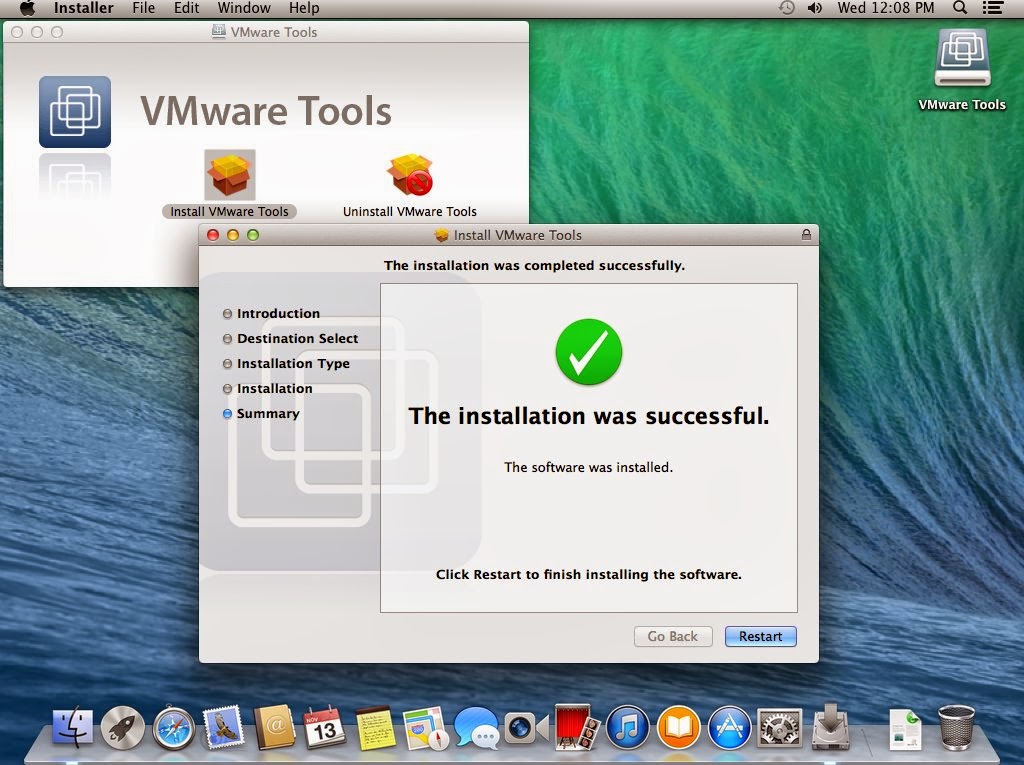
Step 9:-Install VMWARE tools to get the native resolution using darwin.iso that came with the unlocker.
Step 10:- That’s all.