Apple has reveled the new OS X 10.10 Yosemite on 2nd of june at WWDC with this update apple have make several changes in Yosemite with the help of new programming language SWIFT which may replace the Objective-C.To being Hackintosher I need lots of experiments on new updates with several brain panics but i can surely say Developer Previews (DP1/DP2) are the beta update of Apple which have several bugs these are not recommended to any new Hackintosh users or any newbie but I’m just satisfied by this update with New Features and I have tested 2 methods Simple for the newbie and Clover method for advanced users
a. Clover Boot loader-Build 2695 and newer
b. An 8GB or bigger USB drive
c. Working Hackintosh/Macintosh or VMWARE install machine
d. Yosemite 10.10 DP1/DP2
Simple Guide for Newbies
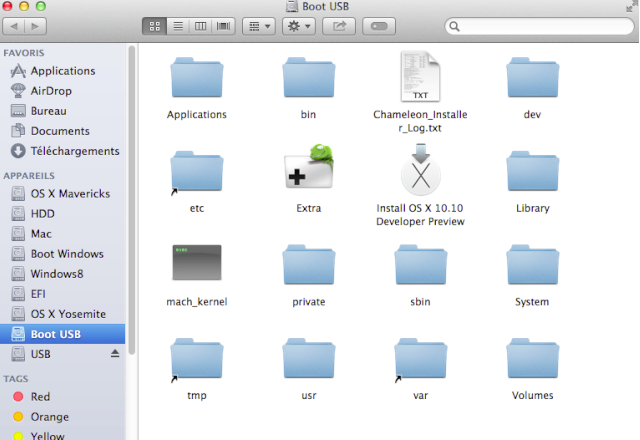
1.Download installer Boot USB OS X Yosemite (Chameleon)
2.Place Your Installer OS X Yosemite.app to /Application
3.Format your USB Flash Drive as GUID/MBR partition map with a HFS+ partition and Name it to USB or anything
4.Run the installer Boot USB OS X Yosemite app and choose you USB drive
6.After the installation reboot your Hackintosh and boot with USB again and
open the terminal and type this
open the terminal and type this
cp -R /Volumes/USB/mach_kernel /Volumes/OSX
and Quit Terminal and quit Installation and boot normally
Note:-OSX be the name of your MAC OS X 10.10 Yosemite Installed partition
Clover Guide for Advanced Users
Creating USB installer
1.Format your USB Flash Drive as GUID / MBR partition map with a HFS+ partition and Name it to USB or anything
2. Mount your 10.10 Yosemite DP1/DP2
then its in /Contents/Shared Support/InstallESD.dmg)
3. Mount BaseSystem.dmg by this terminal commands
open /Volumes/OS X Install ESD/BaseSystem.dmg
4. Restore “OS X Base System” to your USB Flash Drive using disk utility
5. Navigate to /System/Installation your USB drive Delete the “Packages” link
then copy the “Packages” folder from “OS X Install ESD” to this location.
6. Open the Terminal, and enter the following:
Quotes
cp “/Volumes/OS X Install ESD/BaseSystem.dmg” /Volumes/USB/
cp “/Volumes/OS X Install ESD/BaseSystem.chunklist” /Volumes/USB/
and install CLOVER boot loader on USB flash drive (Clover_v2k_r2747)
7.Now Copy the necessary kext which are needed for booting onto the drive.
Make a folder name 10.10 in USB/EFI/CLOVER/Kext/10.10/ and add those kexts on it
FakeSMC.Kext
NullCpuPowerManagement.Kext
AppleAHCIPort.kext
GenericUSBXHCI.kext
AppleACPIPS2Nub.kext
ApplePS2Controller.kext
8.Now install Clover Boot Loader on USB
9.Boot with USB and go into “Clover options”. & Change the boot-arguments to
“-v kext-dev-mode=1” if you have HP laptop then change it like me else you will get
Kernel Panic with LocalACPI
“-v kext-dev-mode=1” if you have HP laptop then change it like me else you will get
Kernel Panic with LocalACPI
“-v kext-dev-mode=1 Cpus=1”
10.Install the OS X 10.10 Yosemite but do not restart when installation is done or restart
and boot with USB again with same argument
and boot with USB again with same argument
11. Open the Terminal and run the following:
and identify your installed partition identifier like mine disk1s5 like mine and do the following
mkdir /Volumes/HD
mount -t hfs /dev//Volumes/HD
and copy your third-party kexts using CP as shown
For example if I wanted to copy FakeSMC.kext:
cp/System/Library/Extensions/FakeSMC.kext/ /Volumes/HD/System/Library/FakeSMC.kext
Close Terminal and reboot into the OS X 10.10 partition,using the same boot-args as before
12.At this point, the system should boot. You may now install anything else you need (kexts, drivers) and begin using the system.
13.Now once you got the Desktop install Clover Boot Loader on OS X 10.10 partition and Edit Config.plist with the help of Clover Configurator and add kext-dev-mode=1 and uncheck the No Cache on like this because Yosemite won’t boot without Cache
14.Now save the file and Enjoy the new update of Apple
Note:-Make sure use correct identifier while coping kext from terminal and make sure to add Boot-argument else your Hackintosh never gonna boot and this guide is tested on OS X Yosemite DP1-DP4


